Create a Group
Creating a Group on the Capacity4dev platform is an excellent way to foster collaboration, knowledge sharing, and professional growth among international cooperation professionals. This step-by-step guide will walk you through the process of creating a Group and provide in-depth explanations for each category required for successful submission.
Build a professional community by following these steps:
- Step: Log in to Your Capacity4dev Account
- Step: Access the "Create a Group" Page
- Step: Fill Out the Group Creation Form
- Step: Submit Your Group for Review
- Step: Manage Your Group as a Space Manager
- Publish Your Group
Detailed steps
Step 1: Log in to Your Capacity4dev Account
Ensure that you are logged in to your Capacity4dev account. If you do not have an account yet, register for one and complete the verification process.
Step 2: Access the "Create a Group" Page
- Navigate to the Capacity4dev homepage.
- Click on the "Browse Content" section.
- Select "Groups."
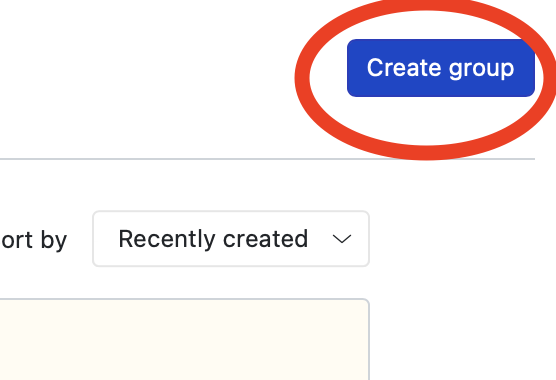
- In the top right corner, click on "Create Group."
Step 3: Fill Out the Group Creation Form
Complete the Group creation form by providing the necessary information in each category:
- Group Name: Enter a unique and descriptive name for your Group. The name of a group will automatically be translated into a path for your Group's URL (which you can edit to make it shorter or different). NOTE: If your Group existed before May 2023, and you want to modify the URL, please contact us at support@capacity4dev.eu
- Group Description: Add a description to explain what your Group is about. The description will appear on your Group's Overview page. Use the Group Description to make it as appealing as possible for new members. For more details about your Group, you can use the Info tab. [learn more about info tab]

- Summary: Provide a captivating and engaging summary of max 200 characters to highlight the essence of your Group. This summary will be visible in the Group list, making it an important element to attract potential members to view or join your Group.

- Group Visibility: Choose if your Group should be Public, Private or Restricted. More on Visibility.
- Group Access: For Public and Restricted Groups, choose either Open (automatic membership) or Moderated (membership upon approval). For Restricted Groups, specify allowed email domains without the '@' sign, separated by spaces (e.g., diplobel.fed.be).
- Related Groups, Projects, and Articles (optional): During the submission process, you can add already existing related Groups, Projects, and Articles to increase visibility and credibility. Linking relevant resources helps build connections within the community and showcases the value of your Group. You are able to add this information also later in draft or published stage.
- Group Topics: Select an unlimited number of Topics and Subtopics that the Group touches upon. This is a very important step as Topics and Countries are the main power behind the suggestions for users.
- Group Countries: Choose anunlimited number of Continents and countries to define your Group's main focus. Tags are essential to allow your Group to be visible in the searches and appear in the personal feeds of members.
- Group Banner: Upload a rectangular banner image (size: 446 x 270 pixels | max size: 512 KB) that will be displayed on your Group's Home. Whenever adding an image, we recommend you add an alternative text (ALT text) and title for accessibility purposes.
- Group Thumbnail: Add a squared thumbnail image (size: 48 x 48 pixels | max size: 512 KB) that will be displayed on all list views, as well as the Groups page and on search results.
- Message to Site Administrator: Indicate the purpose of your Group, your objectives, and any other details that will be submitted to the site administrator for review. This message will support your successful submission of the Group, as all spaces need to go through the validation procedure with the site Administrators at DG INTPA.
- Group Welcome Message: Add a personalised message that will appear in the notification sent to all new Group members.
Step 4: Submit Your Group for Review
- After completing the Group creation form, click the "Save changes" button at the bottom.
- Once your Group has been reviewed by the site administrator, you will receive an email informing you of the next steps.
Step 5: Manage Your Group as a Space Manager
As a Space Manager, both Group Owners and Administrators have the same rights, with the only difference being that the Owner is the main point of contact and is the only one who can make another Administrator an Owner. TIP: For groups related to EU interventions, we recommend having the Owner or at least one Administrator who is an EU institution official for credibility purposes.
When creating a Group, you can choose from three statuses: Draft, Published, and Archived. Here's what each status means:
- Draft: When your Group is in the Draft status, it is not visible to other members on the platform. This status allows you to work on your Group, refine its content, and make adjustments before making it public. When a person requests to set up a Group and it is approved, it will automatically be put into Draft status.
- Published: Once you have finished setting up your Group and are ready to share it with other members, change the status to Published. This makes your Group visible on the platform, allowing members to find, join, and engage with your Group.
- Archived: If your Group is no longer active or relevant, you can change its status to Archived. This will remove the Group from the list of active Groups and disable the "Join" button for new users. Archived Groups can still be accessed, but their content is considered static and not meant for further engagement.
You can change the status of the Group by going to "Manage Group", select "Edit Group" and then choose either "Publish" or "Archive" at the bottom of the page.

Deleting a Group: If you wish to permanently delete a Group, please contact the Capacity4dev Support Team at support@capacity4dev.eu. They will assist you with the deletion process.
Creating a Group on Capacity4dev is a powerful way to connect with like-minded professionals and share knowledge in your field. By following this step-by-step guide, you can ensure that your Group is set up for success and poised to become an invaluable resource for its members.