Managing Your Project
Managing your project on the Capacity4dev platform is essential to maximise its visibility, impact, and relevance for international cooperation professionals. This step-by-step guide will help you efficiently manage your project's content and keep it up-to-date to benefit both your team and the broader community.
Follow these steps to ensure your project runs smoothly and serves as an invaluable space for international cooperation professionals:
- Step: Log in to Your Capacity4dev Account
- Step: Access Your Project Homepage
- Step: Manage the Overview Section
- Step: Manage the Info Section
- Step: Manage the News Section
- Step: Manage the Library Section
- Step: Manage the Events Section
- Step: Keep Your Project up-to-date
- Step: Edit Project Owners or Administrators
- Step: Manage Tabs
Detailed steps
Step 1: Log in to Your Capacity4dev Account
To manage your project, you must first log in to your Capacity4dev account. If you haven't created an account yet, join the platform to get started.
Step 2: Access Your Project Homepage
Go to your project homepage by navigating to "My Profile" after clicking on "My profile” at the top of the page or by searching for your project in the platform's search bar.

Step 3: Manage the Overview Section
The Overview section provides a snapshot of your project, including its description, status, and key details. Update this section regularly to ensure the information remains accurate and relevant.

- You can manage your Overview Section by navigating to your Project Homepage and clicking on “Manage Project” and then “Edit Project”.

- Make sure the Description is up to date and to the point, as it will be shown in the Overview page.
- You can modify all the details under the “Edit Project” button.
- If you are an Owner or Administrator of the Project (Space Manager), you can edit the Owner/Admins by navigating to “Manage Project” and click on “Manage Admins.”
Step 4: Manage the Info Section
In the Info section, you can provide more in-depth information about your project, such as objectives, activities, and outcomes. Use this section to showcase your project's achievements and keep stakeholders informed about its progress.
- You can edit this section by navigating to the “Info” tab.
- You can add more pages by clicking the “Add page” button below the Table of contents.
- To reorganise the order of the table of contents, click on the “Manage pages” button below the Table of contents.

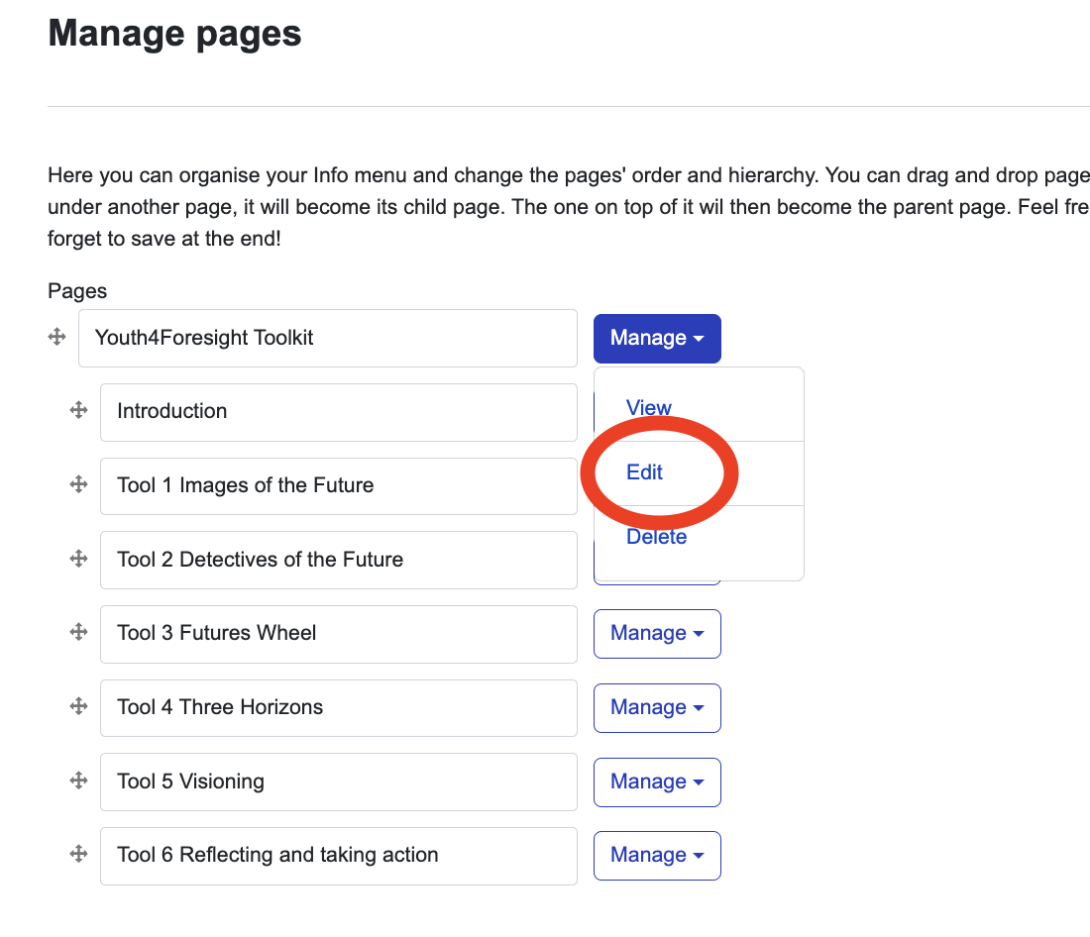
You can edit your pages by going to "Manage pages" and then select "Edit" from drop-down menu.
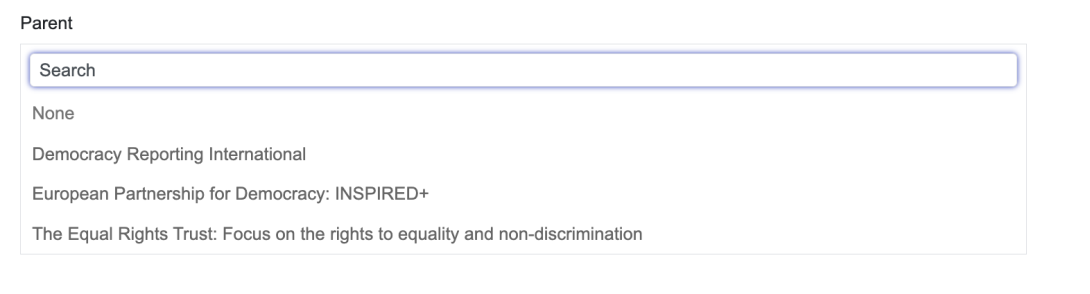
TIP: You can also create sub-folders of your pages by selecting a parent inside the Edit page and then using the drag and drop function.

Here, you can organise your Info menu and change the pages' order and hierarchy. You can drag and drop pages by using the four arrows symbol. When you drag a page to the right, under another page, it will become its child page. The one on top of it will then become the parent page. Feel free to shuffle things around, and edit or delete entire sections. And don't forget to save at the end!
- Keep the pages updated and relevant, providing essential information about the Projects’ purpose and goals.
- Create a clear and organised table of contents to guide members through the Project’s content.
Step 5: Manage the News Section
The News section is an excellent place to share updates, announcements, and milestones related to your project. Regularly post news articles to keep your audience engaged and informed.
- Post News by going to the yellow “Post content” button top right.
- To publish News which are still in draft status, navigate to “Manage” and click on “Drafts.”
The Library is where you can upload and share essential documents, such as reports, guidelines, templates and communication materials. Organise your resources in folders and add relevant tags to make it easy for users to find the information they need.
- Post relevant and valuable documents and items by going to the yellow “Post content” button top right.
- Make sure you publish items which are still in the Draft status.
- Regularly update the library with fresh content and remove outdated or irrelevant materials.
- You can also add folders to your Library so that members can better navigate different materials. The folders work on the same basis as the ones for Info.
Use the Events section to promote upcoming events related to your project, such as workshops, webinars, and conferences. Include all necessary details, like dates, locations, and registration links, to encourage participation.
- To create an Event, go to the yellow “Post content” button top right.
Step 8: Keep Your Project up-to-date
Regularly review and update your project's content to ensure it remains accurate and relevant. This will not only benefit your team but also enhance the overall user experience for those visiting your project.
Step 9: Edit Project Owner or Administrators
If you need to update the Project Owner or Administrators, navigate to the Members section of your project. From there, you can edit the roles of current members or add new Administrators to help manage your project effectively.
- You can manage (add or remove) Project Administrators by clicking on “Manage” on your Project homepage and clicking on “Manage Admins”. Only the Project Owner can appoint a new user to the Project Owner role as a substitution. There can be only one Project Owner and anunlimited number of Project Administrators.
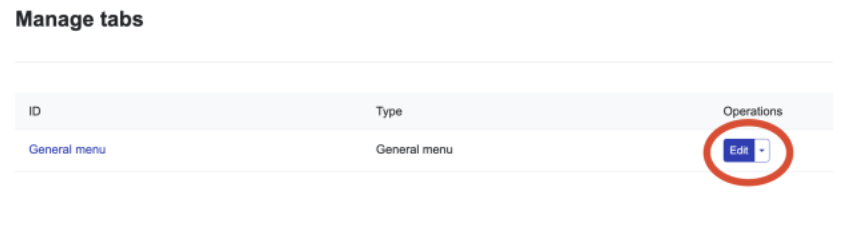
Managing Tabs is a special feature for Projects/Programmes and Resources. It means that you can customise your own navigation bar of your space. To manage Tab, navigate to "Manage Resource" and select "Manage Tabs."

When you are in managing tabs, you click on edit General menu.
You can add either an "add link" (Capacity4dev page) or a tab with an external link (other than the Capacity4dev page), which will redirect members to an external website). When adding a new page, which can be named as wished, you can choose the structure of "Info" page or "Library" page.

The "Overview" tab is the only mandatory tab that cannot be removed. However, you can hide any other tab that is already pre-defined, such as "Info" or "Library".
By following these steps, you will effectively manage your project on the Capacity4dev platform, boosting its impact and ensuring it serves as a valuable resource for international cooperation professionals. If you encounter any issues or require assistance, please contact us at support@capacity4dev.eu. We're here to help!